Discover effective natural methods to remove burnt grease from your kitchen hood filters and surfaces. Learn step-by-step cleaning techniques and maintenance tips for a sparkling appliance.
How to Clean Kitchen Hood Grease Easily: Quick Natural Solutions for a Sparkling Kitchen
The kitchen hood is one of the most exposed parts of your home to grease, smoke, and dust. Whether you cook daily or occasionally, the hood quickly accumulates hard-to-remove deposits, and regular cleaning is not only aesthetic, but also functional — dirty filters reduce suction efficiency and can become a fire hazard.
In this guide you will find:
- how to effectively clean the hood and its filters
- what natural solutions you can use
- how to prevent the reappearance of fat
- what mistakes to avoid
Why is it important to clean the hood regularly?
✔️ Prevents unpleasant odors in the kitchen
✔️ Improves functioning and suction power
✔️ Reduces the risk of bacteria and mold growth
✔️ Avoids dangers caused by grease buildup (flammability)
✔️ Preserves the aesthetic appearance of the appliance
Recommended frequency:
- The metal filter: once every 2–4 weeks
- The outer surface: weekly
- Carbon filter (if equipped): replacement every 3–6 months
Complete hood cleaning – step by step
1. Disconnect the hood from the power supply!
Safety first – never clean the appliance while it’s plugged in.
2. Cleaning metal filters
Filters are the most affected by burnt grease and need deep cleaning.
Method 1: With baking soda and hot water
- Fill a sink or large pot with boiling water
- Add:
- 3 tablespoons baking soda
- 1 cup white vinegar
- 1 tablespoon concentrated dish soap
- Immerse the filters for 15–30 minutes
- Scrub gently with a soft brush or abrasive sponge
- Rinse and let them dry completely
Method 2: Dishwasher
- If the filters are made of stainless steel and do not have plastic components, you can wash them in the dishwasher at high temperature.
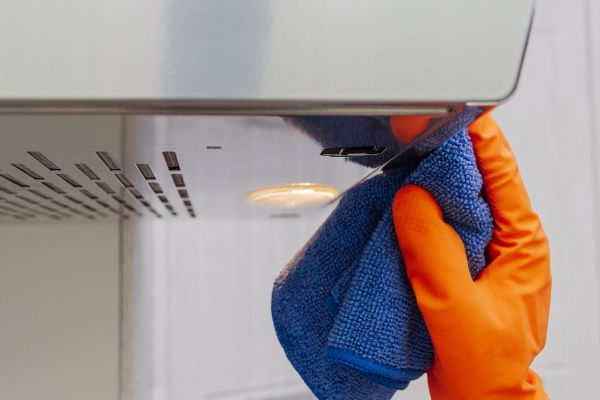
3. Cleaning the outer surface (case, control panel)
DIY solution:
- 250 ml warm water
- 100 ml of vinegar
- 1 tablespoon of dish soap
- 10 drops lemon essential oil (optional)
Instructions:
- Spray the solution on the surfaces
- Leave it on for 5 minutes
- Wipe with a soft microfiber cloth
- For hardened grease, use a soft sponge + baking soda paste
4. Control panel / buttons
- Clean gently with a damp cloth soaked in vinegar water
- Prevents liquid from leaking inside the hood
5. Interior cleaning (if accessible)
- Carefully wipe the inner walls with a damp cloth
- Do not spray liquid directly inside – wet the cloth first
❌ Common mistakes to avoid
| Mistake | Why is it problematic? |
|---|---|
| Using hard abrasive sponges | They can scratch surfaces, especially stainless steel |
| Cleaning with the device connected | Danger of electric shock |
| Washing filters too infrequently | Reduces absorption efficiency, odors appear |
| Incomplete drying of the filters | Favors the appearance of rust |
Natural tricks for easy maintenance
- Spray diluted vinegar after each intense cooking session
- Wipe the exterior once a week with a damp cloth
- Use aluminum foil over the inner grills (where permitted by the manufacturer) for easier cleaning
- Place one bowl of water + vinegar on the stove and turn on the hood for 10 minutes – it helps to dissolve deposits
❓ Frequently asked questions
How often should the hood be cleaned?
Clean the filters every 2–4 weeks, the exterior once a week, and replace the carbon filter (if present) every 3–6 months.
What can I do if the grease is very stubborn?
Boil the filters in a mixture of baking soda and water or soak them overnight.
Can I use commercial grease sprays?
Yes, but choose biodegradable products and avoid overly corrosive ones, especially if your hood is stainless steel.
Is it necessary to clean the hood if I don’t cook often?
Yes. Dust and grease from the air settle even without frequent cooking.
Conclusion
Regular cleaning of the kitchen hood not only keeps your home clean and smelling good, but also extends the life of the appliance. With a few natural ingredients and a little effort, you can get rid of burnt grease and unsightly deposits efficiently and safely.


Comments are closed.