
Discover, explore and be inspired.

Beginner Guide to Composting at Home That Works

Beginner Guide to Composting at Home That Works

Start turning kitchen scraps and yard waste into rich soil with this beginner guide to composting at home, including simple setup and care tips today.
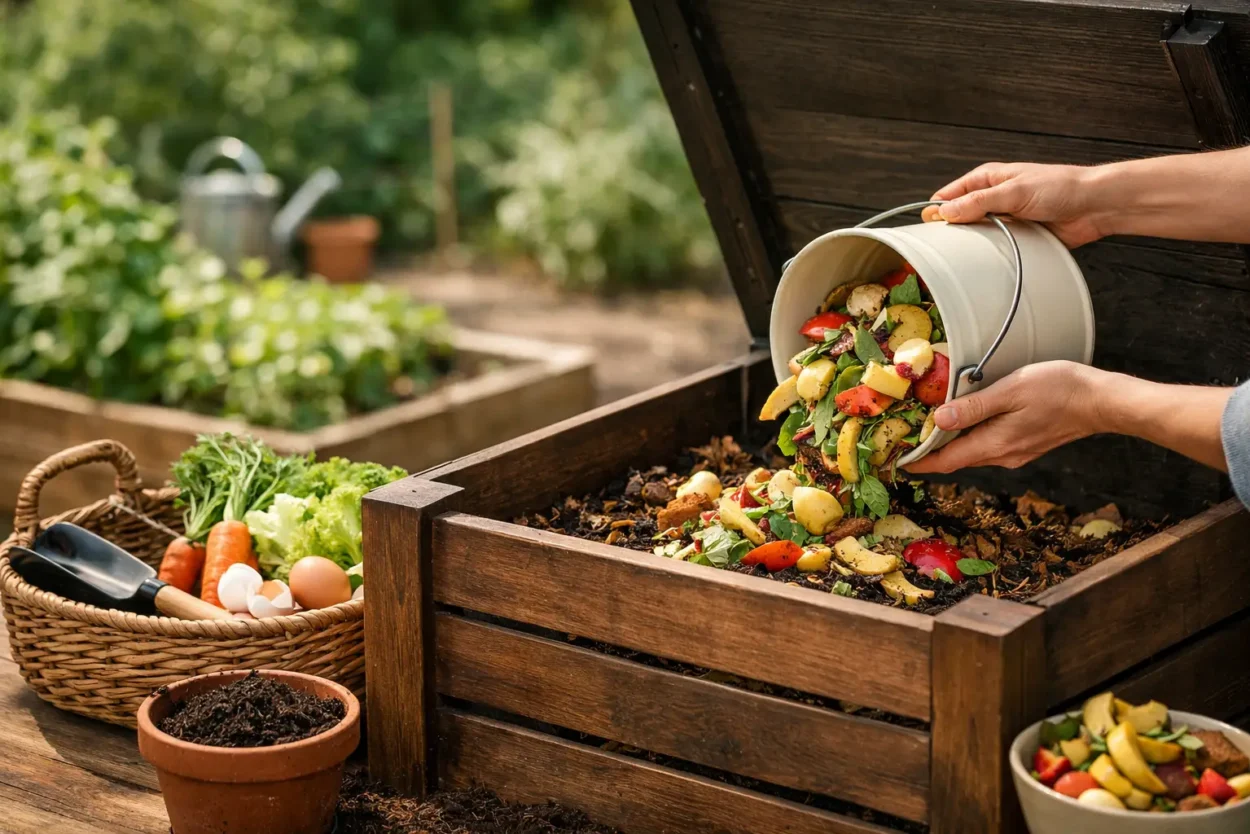
A banana peel, coffee grounds, and a handful of dry leaves can become something far more useful than trash. This beginner guide to composting at home makes the process feel less like a science project and more like an easy weekly habit that benefits your garden, houseplants, and outdoor space.

Composting is simply controlled decomposition. Tiny organisms break down natural materials into a dark, crumbly soil booster often called compost. You do not need a large yard, expensive equipment, or perfect technique to get started. A small outdoor bin, a covered container, or even a countertop setup can work, depending on your space and routine.

Why Composting Is Worth Trying

The most immediate benefit is less food waste in your garbage can. Fruit and vegetable scraps, eggshells, coffee grounds, and yard clippings all add up quickly, especially if you cook at home often. Composting gives those everyday leftovers a second purpose instead of sending them to a landfill.

Finished compost also improves soil without relying entirely on store-bought fertilizers. It helps soil hold moisture, adds organic matter, and supports healthier plants. If you are growing herbs, tomatoes, flowers, or even a few balcony containers, a little homemade compost can make a noticeable difference over time.

There is a trade-off: composting does require a bit of attention. The good news is that most problems, including odor or a soggy pile, are easy to fix once you understand the basic balance.

Choose the Best Composting Setup for Your Space

The best beginner setup is the one you will actually use. Before buying anything, think about where your food scraps will go and how often you are willing to tend the pile.

Outdoor compost bin or pile

An outdoor bin is a practical choice for homes with a yard. You can buy a basic lidded bin, build a simple enclosure, or create a small pile in a tucked-away corner. A bin looks neater and helps keep animals out, while an open pile is inexpensive and easy to expand.

Place it on bare soil if possible. This lets beneficial worms and organisms move up into the compost. Choose a spot with decent drainage that is easy to reach from the kitchen, even when the weather is not perfect. If it is too far away, scraps tend to end up in the trash instead.

Tumbler composters

A tumbler is a sealed barrel that turns on a frame. It can be tidy, convenient, and faster than a stationary pile because mixing is easier. It is a good option for small yards or anyone who prefers a cleaner-looking setup.

The downside is capacity. Tumblers fill up quickly, and they may dry out faster than a ground-level pile. They are convenient, but not essential for beginners.

Indoor composting options

Apartment dwellers can still compost. A small countertop container can hold scraps for a few days before they are taken to a community compost drop-off, farmers market collection, or a friend’s outdoor bin. Keep the container covered, and line it with newspaper or a compostable paper bag if cleanup is a concern.

Worm composting, also called vermicomposting, is another indoor-friendly option. Red wiggler worms live in bedding and process many fruit and vegetable scraps. This method can be excellent for small spaces, but it comes with a learning curve. Worms need moderate temperatures and should not be fed large amounts of citrus, onions, or watery scraps at once.

The Simple Rule: Balance Greens and Browns

Successful compost needs two main types of material: greens and browns. The names can be confusing because they are about nitrogen and carbon, not always the item’s actual color.

Greens are generally moist, nitrogen-rich materials. Browns are dry, carbon-rich materials. Aim for roughly two to three parts browns for every one part greens. You do not need to measure with a cup. Think of it as adding a generous layer of dry material whenever you add a batch of kitchen scraps.

Good greens include:

  • Fruit and vegetable scraps
  • Coffee grounds and paper filters
  • Tea leaves and plain paper tea bags
  • Fresh grass clippings
  • Crushed eggshells

Good browns include:

  • Dry leaves
  • Shredded newspaper or plain cardboard
  • Paper towels without cleaners or grease
  • Straw or untreated wood chips
  • Small twigs and dry plant trimmings

Browns are what keep the pile from becoming wet, dense, and smelly. Keep a bag of shredded leaves, torn cardboard, or newspaper near your compost container so it is easy to add as you go.

What Not to Put in Your Compost

Some materials attract pests, create strong odors, or break down poorly in a home setup. Avoid meat, fish, bones, dairy products, greasy foods, and cooking oil. Pet waste should stay out of compost intended for gardens, and charcoal ash is not a good choice because it may contain substances that are harmful to plants.

You should also skip diseased plants, weeds covered in seeds, and anything treated with herbicides or pesticides. A hot, carefully managed compost system can handle more materials, but a beginner pile is usually better kept simple.

Compostable packaging can be tricky, too. A label that says “compostable” does not always mean it will break down in a backyard bin. Many of these products need the high heat of an industrial facility. When in doubt, leave it out.

How to Start a Compost Pile Step by Step

Start with a loose base layer of twigs or coarse dry leaves to improve airflow. Add a layer of browns, then a smaller layer of greens, and continue building as you collect materials. Chop large scraps, thick stems, and big pieces of cardboard into smaller pieces when you can. Smaller pieces break down faster.

Moisture matters, but the pile should never feel soaked. A good compost pile feels like a wrung-out sponge: damp enough to hold together, but not dripping. If it is dry, add a little water or more fresh greens. If it is wet or smells sour, mix in dry leaves, shredded cardboard, or other browns.

Turning the pile every week or two introduces oxygen and helps materials decompose evenly. Use a garden fork, shovel, or compost aerator. If you do not turn it often, composting will still happen. It will simply take longer, which is perfectly fine for a low-maintenance setup.

Troubleshooting Common Compost Problems

A healthy compost pile usually smells earthy, like a forest floor. If yours smells unpleasant, it likely has too many greens, too much water, or not enough air. Add browns and turn the pile to loosen compacted material.

If your compost is not breaking down, check whether it is too dry or made mostly of tough, oversized pieces. Add a little moisture, chop materials smaller, and mix in some fresh greens. Cold weather can slow everything down, so do not be discouraged if your pile seems quiet during winter.

Fruit flies around a kitchen scrap container are annoying but common. Bury scraps under dry browns in an outdoor bin, empty indoor containers more often, and keep a tight-fitting lid on countertop containers. Freezing scraps until you are ready to add them to the pile is another easy option.

Pests are usually a sign that food scraps are exposed or that prohibited items made their way in. Cover fresh kitchen waste with leaves or cardboard, use a lid, and avoid meat, dairy, and oily leftovers.

When Is Compost Ready to Use?

Compost can take anywhere from a few months to a year to finish. The timing depends on the size of the pile, the season, the materials you use, and how often you turn it. Finished compost is dark brown, crumbly, and earthy-smelling. You should not be able to recognize most of the original scraps.

Use it as a top dressing around established plants, mix it into garden beds before planting, or blend a small amount into potting soil for outdoor containers. Compost is gentle, but more is not always better. A one- to two-inch layer over garden soil is usually plenty, while houseplants and small pots benefit from a lighter touch.

Your first batch may not look picture-perfect, and that is okay. Start with the scraps you already have, add dry browns regularly, and let the process become part of your home routine. A few saved peels and leaves today can help create richer soil for the plants you are excited to grow next season.


Post navigation

Beginner Guide to Composting at Home That Works

Beginner Guide to Composting at Home That Works

Start turning kitchen scraps and yard waste into rich soil with this beginner guide to composting at home, including simple setup and care tips today.

A banana peel, coffee grounds, and a handful of dry leaves can become something far more useful than trash. This beginner guide to composting at home makes the process feel less like a science project and more like an easy weekly habit that benefits your garden, houseplants, and outdoor space.

Composting is simply controlled decomposition. Tiny organisms break down natural materials into a dark, crumbly soil booster often called compost. You do not need a large yard, expensive equipment, or perfect technique to get started. A small outdoor bin, a covered container, or even a countertop setup can work, depending on your space and routine.

Why Composting Is Worth Trying

The most immediate benefit is less food waste in your garbage can. Fruit and vegetable scraps, eggshells, coffee grounds, and yard clippings all add up quickly, especially if you cook at home often. Composting gives those everyday leftovers a second purpose instead of sending them to a landfill.

Finished compost also improves soil without relying entirely on store-bought fertilizers. It helps soil hold moisture, adds organic matter, and supports healthier plants. If you are growing herbs, tomatoes, flowers, or even a few balcony containers, a little homemade compost can make a noticeable difference over time.

There is a trade-off: composting does require a bit of attention. The good news is that most problems, including odor or a soggy pile, are easy to fix once you understand the basic balance.

Choose the Best Composting Setup for Your Space

The best beginner setup is the one you will actually use. Before buying anything, think about where your food scraps will go and how often you are willing to tend the pile.

Outdoor compost bin or pile

An outdoor bin is a practical choice for homes with a yard. You can buy a basic lidded bin, build a simple enclosure, or create a small pile in a tucked-away corner. A bin looks neater and helps keep animals out, while an open pile is inexpensive and easy to expand.

Place it on bare soil if possible. This lets beneficial worms and organisms move up into the compost. Choose a spot with decent drainage that is easy to reach from the kitchen, even when the weather is not perfect. If it is too far away, scraps tend to end up in the trash instead.

Tumbler composters

A tumbler is a sealed barrel that turns on a frame. It can be tidy, convenient, and faster than a stationary pile because mixing is easier. It is a good option for small yards or anyone who prefers a cleaner-looking setup.

The downside is capacity. Tumblers fill up quickly, and they may dry out faster than a ground-level pile. They are convenient, but not essential for beginners.

Indoor composting options

Apartment dwellers can still compost. A small countertop container can hold scraps for a few days before they are taken to a community compost drop-off, farmers market collection, or a friend’s outdoor bin. Keep the container covered, and line it with newspaper or a compostable paper bag if cleanup is a concern.

Worm composting, also called vermicomposting, is another indoor-friendly option. Red wiggler worms live in bedding and process many fruit and vegetable scraps. This method can be excellent for small spaces, but it comes with a learning curve. Worms need moderate temperatures and should not be fed large amounts of citrus, onions, or watery scraps at once.

The Simple Rule: Balance Greens and Browns

Successful compost needs two main types of material: greens and browns. The names can be confusing because they are about nitrogen and carbon, not always the item’s actual color.

Greens are generally moist, nitrogen-rich materials. Browns are dry, carbon-rich materials. Aim for roughly two to three parts browns for every one part greens. You do not need to measure with a cup. Think of it as adding a generous layer of dry material whenever you add a batch of kitchen scraps.

Good greens include:

  • Fruit and vegetable scraps
  • Coffee grounds and paper filters
  • Tea leaves and plain paper tea bags
  • Fresh grass clippings
  • Crushed eggshells

Good browns include:

  • Dry leaves
  • Shredded newspaper or plain cardboard
  • Paper towels without cleaners or grease
  • Straw or untreated wood chips
  • Small twigs and dry plant trimmings

Browns are what keep the pile from becoming wet, dense, and smelly. Keep a bag of shredded leaves, torn cardboard, or newspaper near your compost container so it is easy to add as you go.

What Not to Put in Your Compost

Some materials attract pests, create strong odors, or break down poorly in a home setup. Avoid meat, fish, bones, dairy products, greasy foods, and cooking oil. Pet waste should stay out of compost intended for gardens, and charcoal ash is not a good choice because it may contain substances that are harmful to plants.

You should also skip diseased plants, weeds covered in seeds, and anything treated with herbicides or pesticides. A hot, carefully managed compost system can handle more materials, but a beginner pile is usually better kept simple.

Compostable packaging can be tricky, too. A label that says “compostable” does not always mean it will break down in a backyard bin. Many of these products need the high heat of an industrial facility. When in doubt, leave it out.

How to Start a Compost Pile Step by Step

Start with a loose base layer of twigs or coarse dry leaves to improve airflow. Add a layer of browns, then a smaller layer of greens, and continue building as you collect materials. Chop large scraps, thick stems, and big pieces of cardboard into smaller pieces when you can. Smaller pieces break down faster.

Moisture matters, but the pile should never feel soaked. A good compost pile feels like a wrung-out sponge: damp enough to hold together, but not dripping. If it is dry, add a little water or more fresh greens. If it is wet or smells sour, mix in dry leaves, shredded cardboard, or other browns.

Turning the pile every week or two introduces oxygen and helps materials decompose evenly. Use a garden fork, shovel, or compost aerator. If you do not turn it often, composting will still happen. It will simply take longer, which is perfectly fine for a low-maintenance setup.

Troubleshooting Common Compost Problems

A healthy compost pile usually smells earthy, like a forest floor. If yours smells unpleasant, it likely has too many greens, too much water, or not enough air. Add browns and turn the pile to loosen compacted material.

If your compost is not breaking down, check whether it is too dry or made mostly of tough, oversized pieces. Add a little moisture, chop materials smaller, and mix in some fresh greens. Cold weather can slow everything down, so do not be discouraged if your pile seems quiet during winter.

Fruit flies around a kitchen scrap container are annoying but common. Bury scraps under dry browns in an outdoor bin, empty indoor containers more often, and keep a tight-fitting lid on countertop containers. Freezing scraps until you are ready to add them to the pile is another easy option.

Pests are usually a sign that food scraps are exposed or that prohibited items made their way in. Cover fresh kitchen waste with leaves or cardboard, use a lid, and avoid meat, dairy, and oily leftovers.

When Is Compost Ready to Use?

Compost can take anywhere from a few months to a year to finish. The timing depends on the size of the pile, the season, the materials you use, and how often you turn it. Finished compost is dark brown, crumbly, and earthy-smelling. You should not be able to recognize most of the original scraps.

Use it as a top dressing around established plants, mix it into garden beds before planting, or blend a small amount into potting soil for outdoor containers. Compost is gentle, but more is not always better. A one- to two-inch layer over garden soil is usually plenty, while houseplants and small pots benefit from a lighter touch.

Your first batch may not look picture-perfect, and that is okay. Start with the scraps you already have, add dry browns regularly, and let the process become part of your home routine. A few saved peels and leaves today can help create richer soil for the plants you are excited to grow next season.

Post navigation