
Learn how to prune mint plants for fuller, healthier growth. Get the right timing, easy cutting tips, and ways to keep mint from turning woody indoors.
How to Prune Mint Plants for Fuller Growth
Mint has a habit of looking lush one week and leggy the next. The good news is that learning how to prune mint plants is simple, and a few well-placed cuts can turn a thin, sprawling plant into a fuller herb patch ready for tea, salads, cocktails, and summer desserts.
Unlike slower-growing herbs, mint responds well to regular harvesting. Pruning is not just a way to tidy it up. It encourages the plant to branch, produces more tender leaves, and helps prevent the lower stems from becoming bare and woody.
Why Pruning Makes Mint Grow Better
Every mint stem has points where leaves grow in pairs, called nodes. When you cut just above a node, the plant usually sends out new side shoots below that cut. Instead of one tall stem, you get two or more stems, which is exactly how mint becomes bushier.
Regular trimming also keeps the flavor at its best. Young mint leaves are typically softer and more fragrant than older leaves. If a plant is left alone for too long, it can become tall, sparse, and focused on making flowers rather than fresh foliage.
That said, do not prune a newly planted or struggling mint plant aggressively. A small plant needs time to establish roots. Wait until it has several healthy stems and is actively growing before taking a substantial harvest.
When to Prune Mint Plants
The best time to prune mint is during its active growing season, usually spring through early fall. Once daytime temperatures are reliably mild and the plant is putting out new leaves, you can begin pinching and cutting stems as needed.
For the best flavor, harvest in the morning after dew has dried but before the afternoon heat. The leaves are usually at their freshest then. If you are cutting mint for cooking that day, this timing makes a noticeable difference.
A simple rule works for most home gardeners: trim when stems reach about 6 to 8 inches tall, or whenever the plant starts looking stretched out. During peak summer growth, container mint may need attention every one to two weeks. Garden-bed mint can grow even faster.
Prune Before Mint Flowers
Mint flowers are pretty and helpful for pollinators, but flowering changes the plant’s priorities. Once it begins blooming, leaf growth can slow and the flavor may become less vibrant. If your goal is an abundant supply of leaves, remove flower buds as soon as you spot them.
You do not have to panic if your mint has already flowered. Cut the flowering stems back to just above a healthy pair of leaves. The plant should continue producing new growth, especially if the weather is still warm.
How to Prune Mint Plants Step by Step
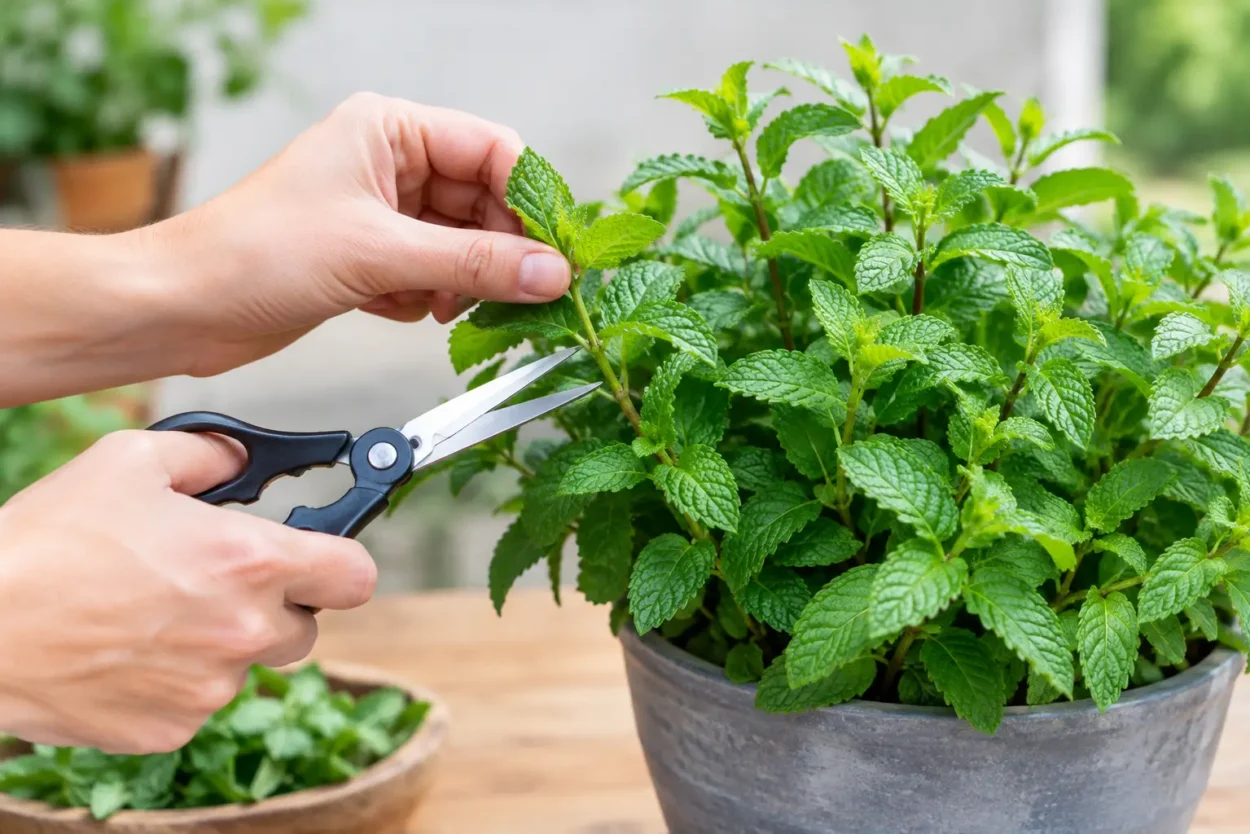
Start with clean, sharp scissors, herb snips, or pruning shears. Clean tools help prevent the spread of plant diseases, particularly if you are trimming several houseplants or herbs at once.
Choose the longest stems first. Follow each stem down from the tip until you find a pair of healthy leaves. Make your cut about one-quarter inch above that leaf pair. Avoid leaving a long bare stub, which can dry out and look messy.
For a light harvest, remove the top 2 to 3 inches from several stems. This is perfect when you only need a handful of mint for a recipe and want to keep the plant compact. Pinching the soft growing tip with your fingers works well, too.
For a fuller reset, cut longer stems back by about one-third to one-half. Leave at least two to three sets of healthy leaves on each stem so the plant has enough foliage to recover quickly. Never strip every leaf from a small plant.
If your mint is very overgrown, resist the urge to cut it all the way to the soil at once. Trim it back by roughly one-third, water it well, and let it regrow. A second trim can follow in a couple of weeks if needed.
The Best Way to Prune Potted Mint
Potted mint benefits from frequent, gentle pruning because container plants can get crowded quickly. Cut stems around the outside and top of the plant to maintain a rounded shape. This lets light reach the center and prevents the middle from becoming thin and bare.
If stems are trailing over the edge of the pot, trim them back to encourage fresh growth closer to the base. A pot that is packed with roots may still look tired even after pruning, though. If water runs straight through the soil or growth has slowed, move the plant into a slightly larger container with fresh potting mix.
Mint prefers evenly moist soil, but it should not sit in water. After a larger pruning session, water thoroughly and let excess moisture drain. Place indoor mint near a bright window where it receives several hours of light each day.
Pruning Mint Growing in the Garden
Mint planted directly in the ground is often more vigorous than potted mint. That sounds ideal until it starts spreading into nearby beds. Pruning the top growth helps, but it will not stop underground runners from traveling.
Keep garden mint contained by growing it in a buried pot or giving it a designated area where spreading is welcome. When you prune, cut the tallest stems back to keep the patch dense and manageable. Pull or dig up runners that have escaped into unwanted spaces.
A large outdoor mint patch can handle a stronger harvest. You can cut it back by about one-third several times throughout the growing season, as long as it is healthy and watered during dry weather. Just avoid a hard prune during extreme heat, when recovery may be slower.
What to Do With Woody or Leggy Mint
Leggy mint has long stems with leaves mostly near the top. It is usually caused by insufficient light, skipped pruning, overcrowding, or a combination of all three. Fortunately, it is often fixable.
Cut the longest stems back to a point where healthy leaves are still growing. Then move the plant to brighter conditions if possible. Outdoor mint generally appreciates morning sun and some afternoon shade in hotter climates, while indoor plants need bright light to stay compact.
Woody stems near the base are normal on older plants, especially after a long growing season. Do not cut into completely brown, leafless wood unless you are sure the plant is still alive below it. Instead, focus on pruning green stems and removing any dead or damaged growth.
If an older mint plant remains sparse despite better light and regular cuts, take a few healthy stem cuttings and start fresh plants. Mint roots easily in water or moist potting soil, making it one of the easiest herbs to renew.
Common Mint Pruning Mistakes to Avoid
The most common mistake is harvesting only a few leaves from the top of every stem. This leaves long, bare stems behind and does little to encourage branching. Cut the stem above a leaf pair instead.
Another mistake is cutting too much from a young, recently transplanted, or stressed plant. Mint is resilient, but it still needs leaves to make energy. Give it time to settle in before taking large harvests.
It also helps to avoid cutting mint when the soil is bone-dry and the plant is wilted from heat. Water first, let it perk up, and prune when it is no longer stressed. Healthy conditions lead to cleaner recovery and faster new growth.
Finally, do not throw away good cuttings. Rinse them, pat them dry, and use them right away in iced tea, fruit salad, pesto, tabbouleh, or a simple glass of sparkling water with lime.
How Often Should You Cut Back Mint?
Light pinching can happen whenever you use mint. A more noticeable trim every two to three weeks is usually enough during the growing season, although fast-growing outdoor plants may need weekly attention.
Think of pruning as part of using the herb, not an extra garden chore. The more thoughtfully you harvest, the more attractive and productive the plant becomes. Keep a pair of clean kitchen scissors nearby, and your next mojito or minty salad can double as a quick boost for the plant.